Change a Beer Gas Tank
Draft system overview
If many taps start pouring badly at the same time, it is a good indication of low gas pressure in the draft system.
There are two different gases, from two different tanks, that make up the draft system gas: carbon dioxide (CO2), and nitrogen. These gases go into a box called a blender, that mixes the gases to the correct ratio and sends the mix to the kegs. A low or empty tank of either gas will cause low pressure, and bad pouring.
In addition to the two tanks connected to the blender, there will be another CO2 tank with a special regulator on it. Sam uses this tank for beer carbonation and we don’t need to worry about it. We are only concerned with the nitrogen tank and the CO2 tank that says “BAR” in red tape on the regulator.
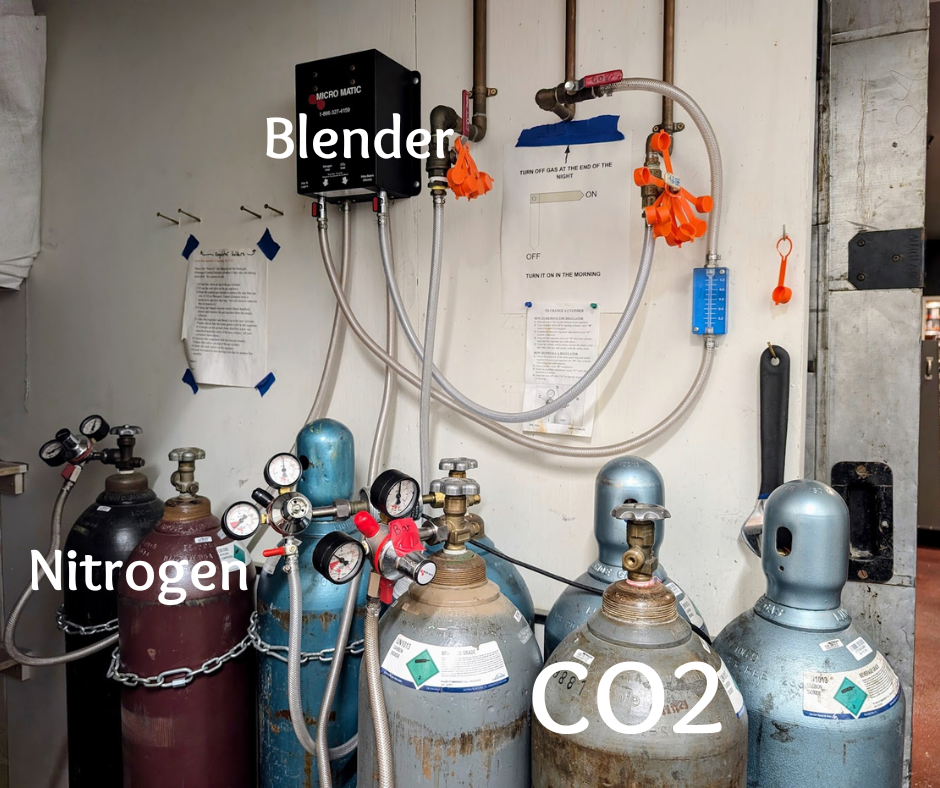
The complete tank setup.
How to tell when a tank is low
You can tell if a gas tank is low by looking at the regulator. There are two gauges on each regulator: one for tank pressure, and one for line pressure.
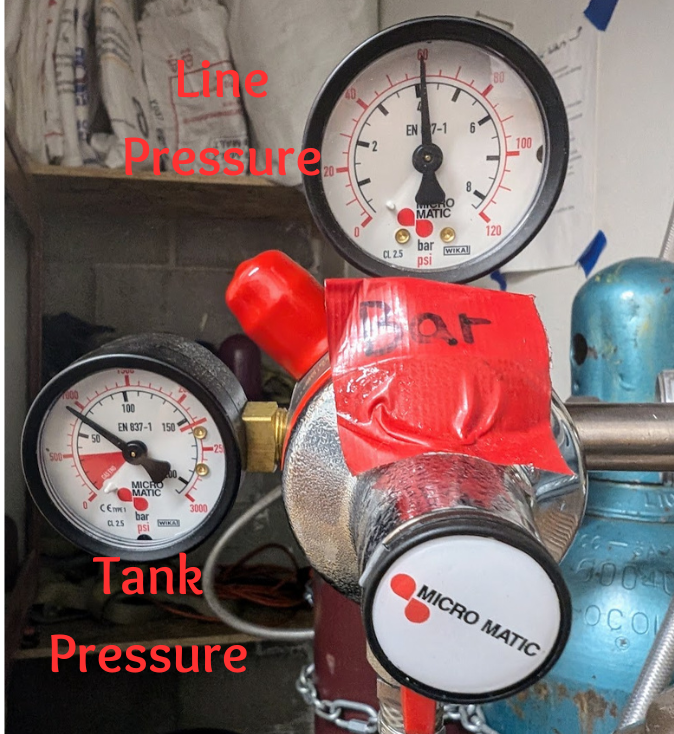
Regulator showing the two pressure gauges.
The tank pressure gauge tells you how much gas is left in the tank. The line pressure gauge tells you how much pressure is coming out of the tank and into the lines.
There is a red zone on the tank pressure gauge. When the needle gets into this range it means the tank is getting low. However, it is not time to change the tank until the line pressure gauge drops below 50 psi.
How to swap the regulator
Once you’ve determined that a tank is low and needs changed, you’ll need to take the regulator off of the empty tank and put it on a new, full tank.
Rambler convention is that full tanks have the metal collars on top, and empty tanks to not.

Take the metal collar and plastic dust cap off of a new tank.
Shut off valve A on the bottom of the regulator.
Turn cylinder valve off by turning cylinder valve B clockwise until it is snugged.
Use the wrench to unscrew the regulator stem nut D from the empty tank.
Screw the regulator stem nut into the new tank, using the wrench to finish tightening. Tight is tight, it doesn’t need to be cranked down with a lot of force.
Open the cylinder valve B completely.
Open the shut off valve A to start the supply of gas into the blender.
That’s it! Once the tank is swapped and pressure is back to normal, it will take a little while for the system to come back into balance. Our beer lines fit almost 4 pints, so count on pouring at least that many from each line before you expect to see a change.